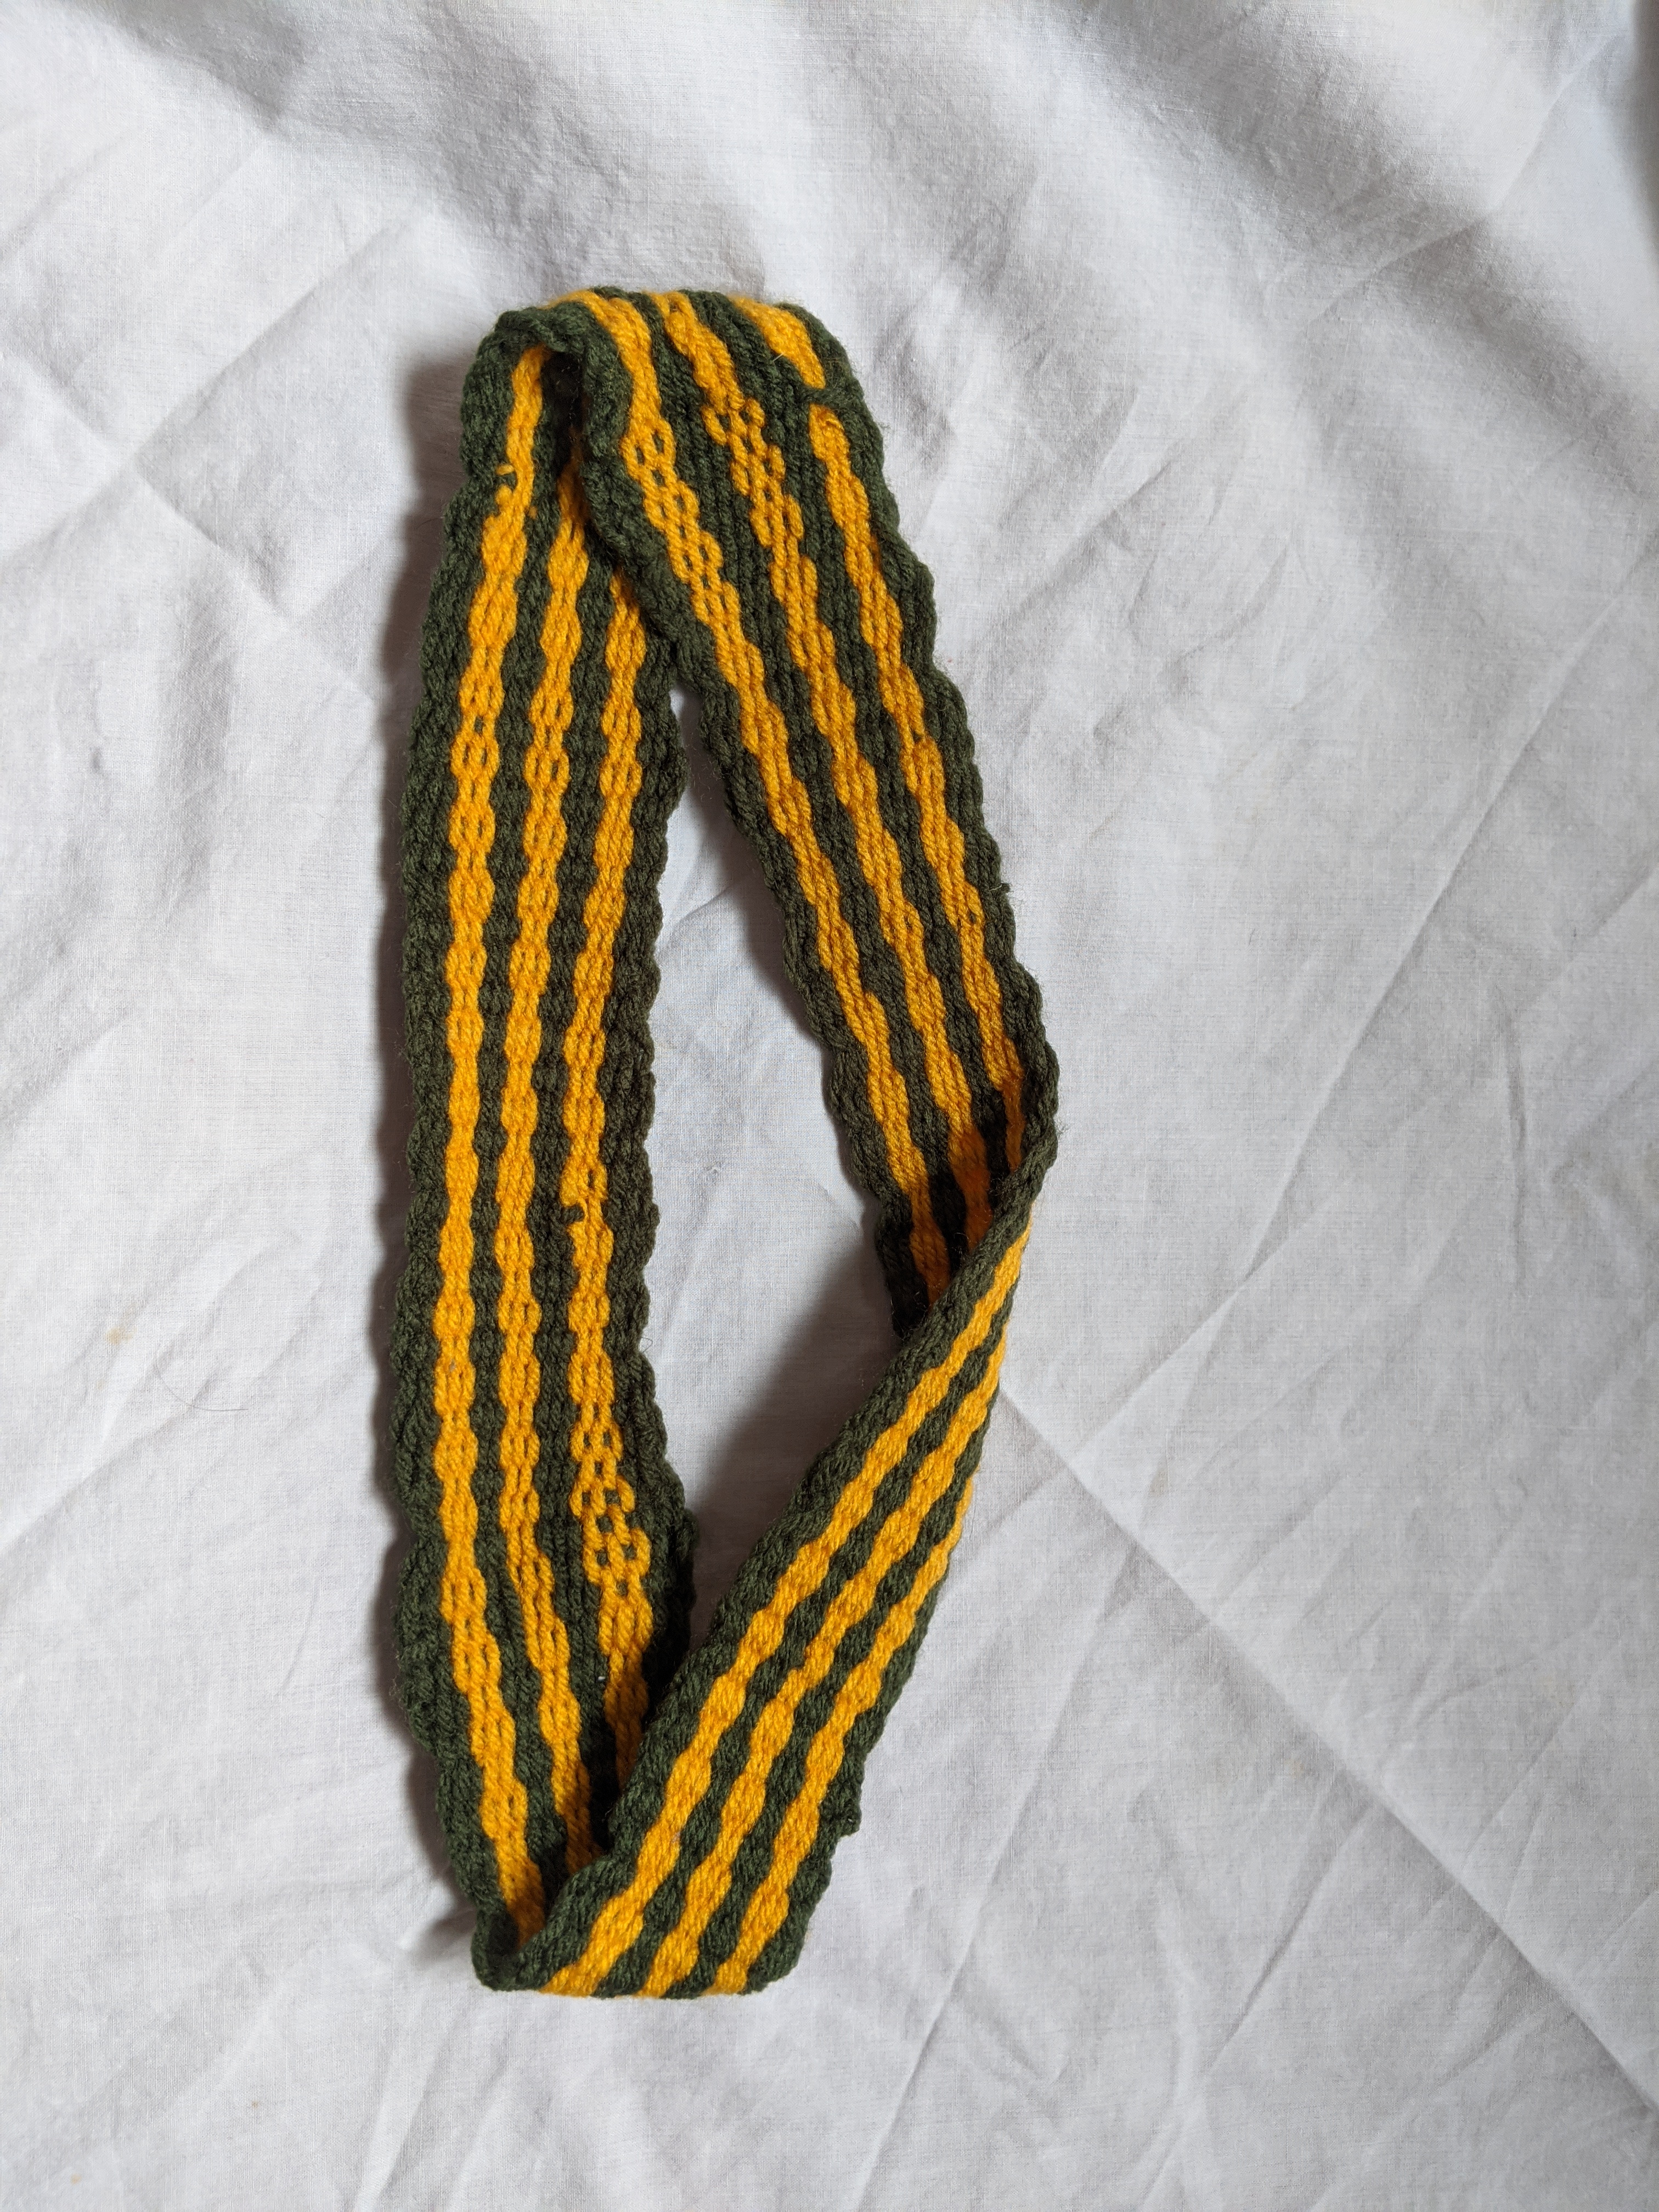
The completed möbius loop.
This is a continuously woven möbius loop. It does not have ends that were joined together after the weaving was complete. The warp threads were continuously looped over the loom with a half twist introduced while warping.
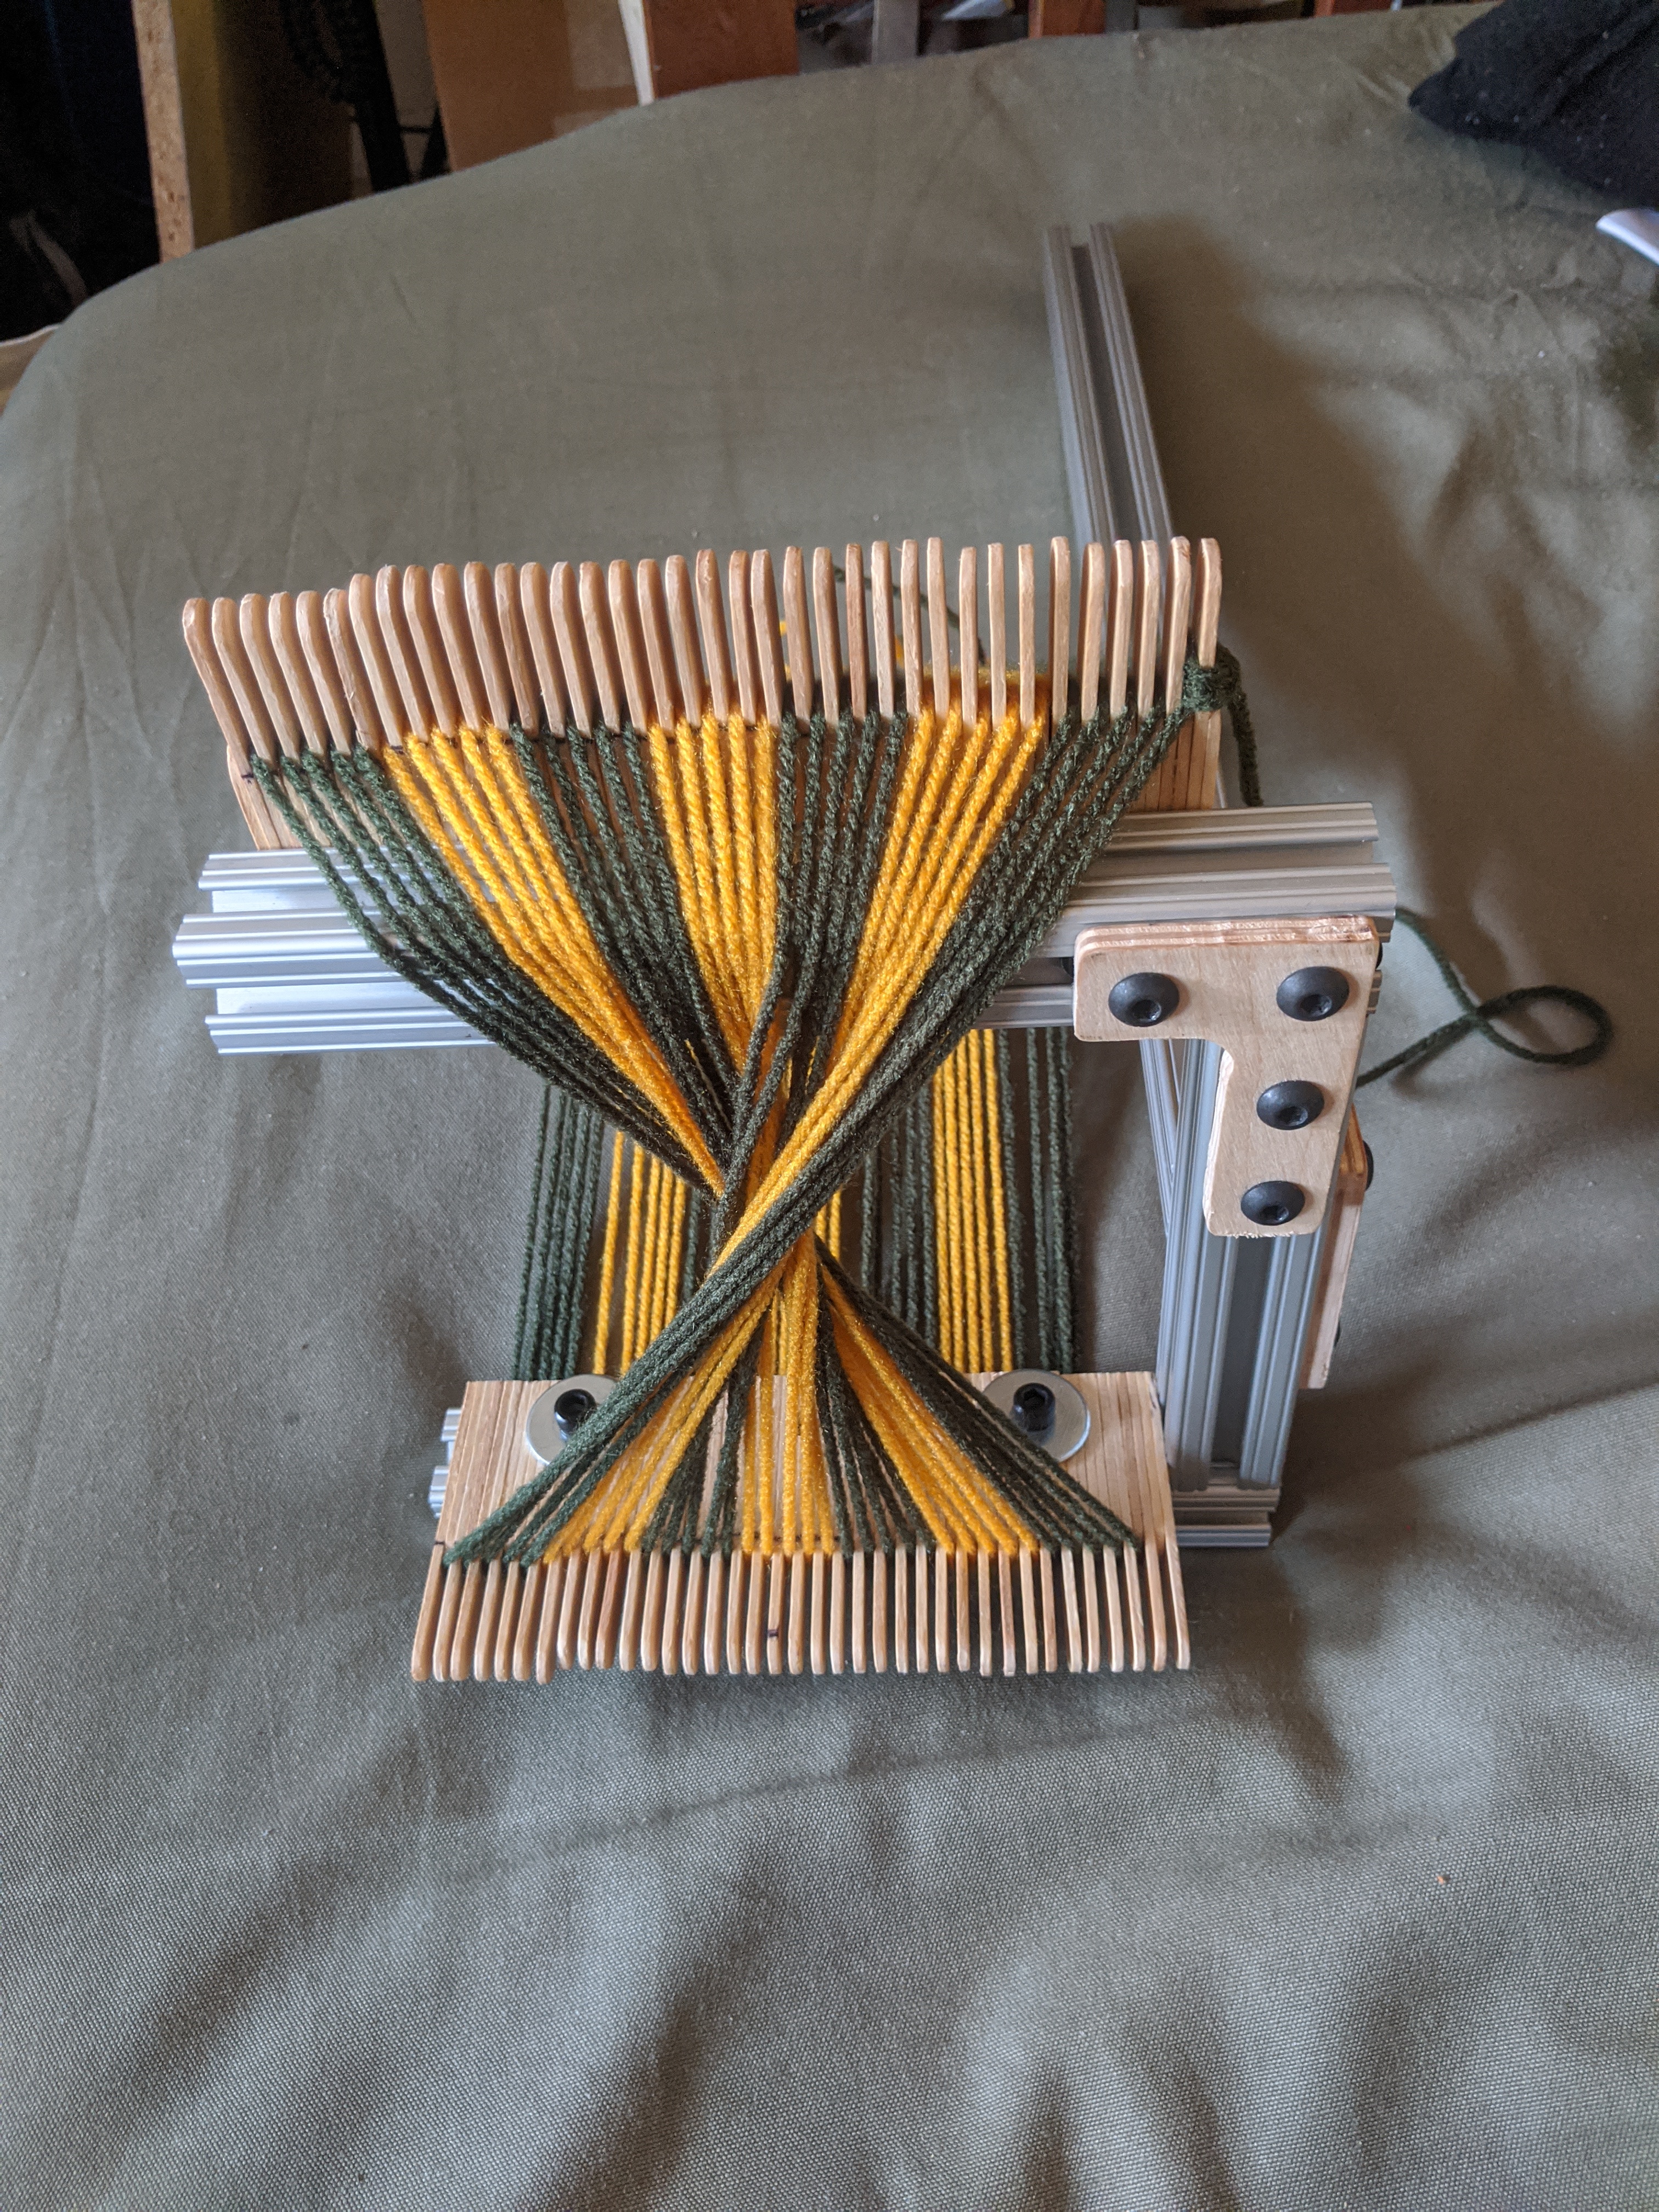
The loom is basically just a structure for holding the warp threads in tension and stationary as you weave. It doesn't matter what you make it out of or how you make it. I happened to have a bunch of scrap 1010 series (1 inch cross section) T-slot aluminum extrusion, so I used that.
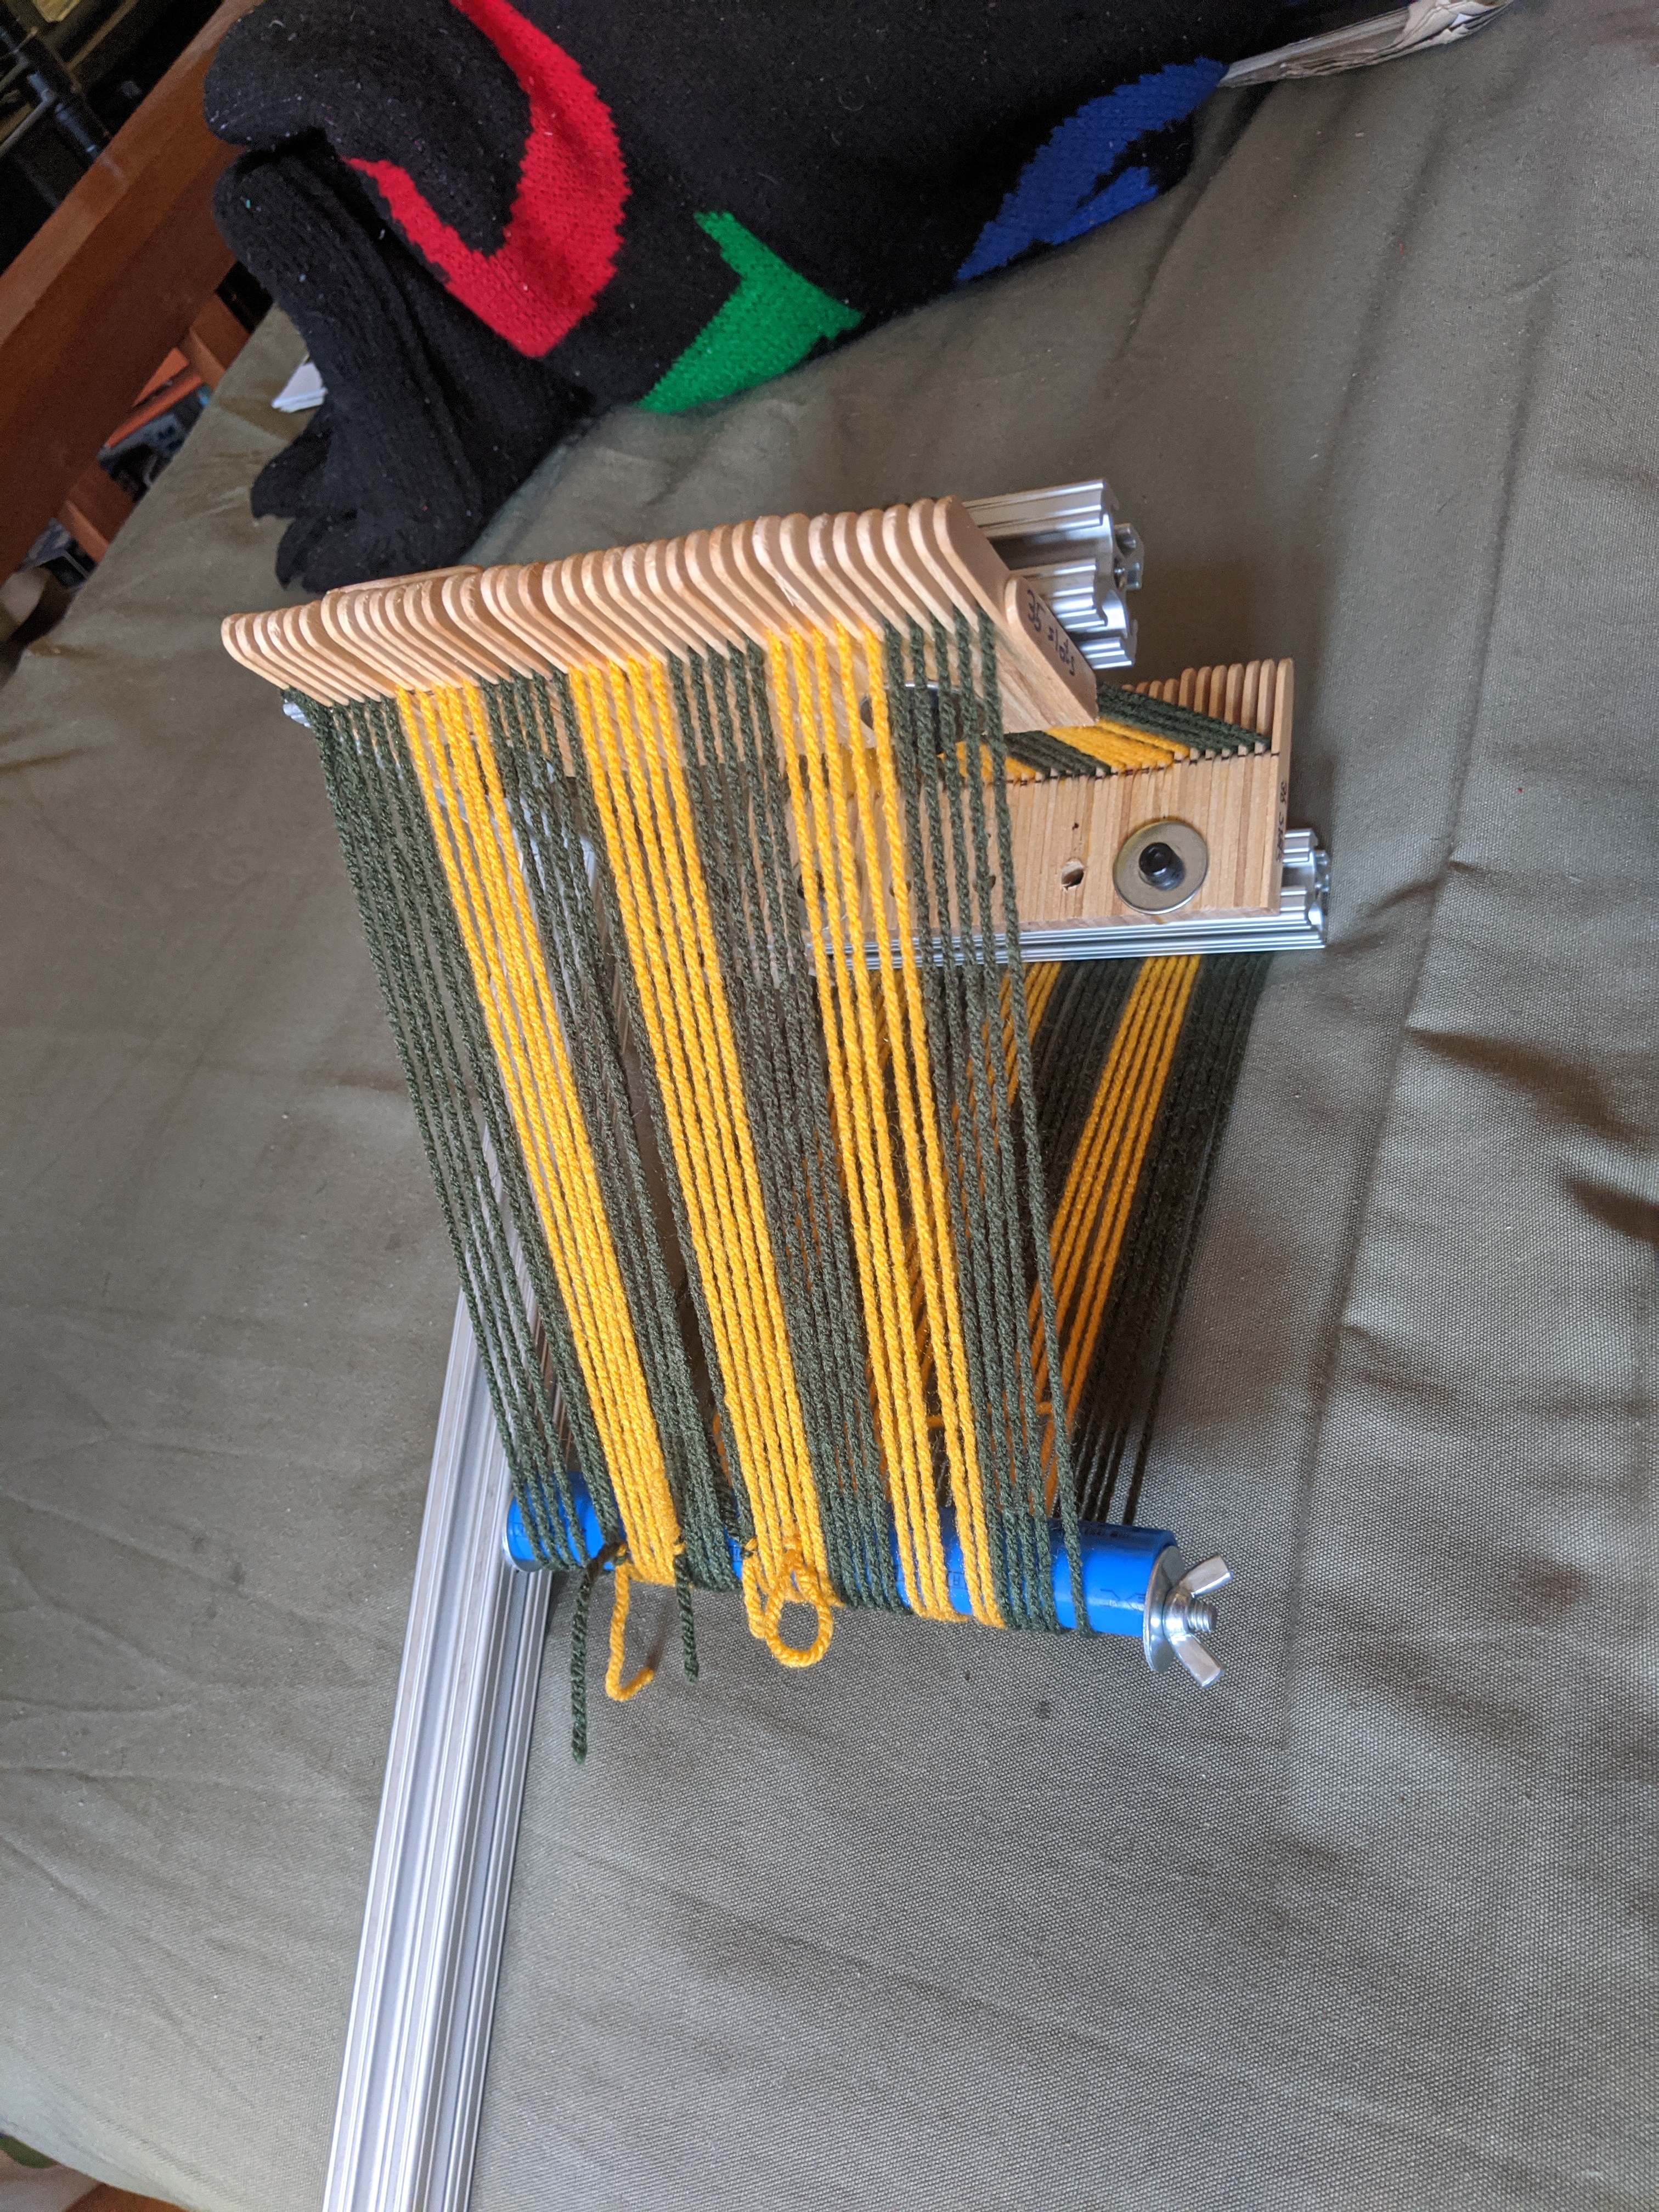
My loom was basically a framework holding a triangular arrangement of bars that the warp would pass around.
I needed a way to keep the warp threads ordered as I warped the loom.
I made a pair of combs out of popsicle sticks, stacked, staggered and glued together. Once the glue dried, the assembly was sawed in half on the axis perpendicular to the popsicle sticks. Holes were then drilled so that the combs could be mounted to two of the loom struts.
Many of these glue joints failed though and needed to be reglued. I expect the popsicle sticks might have a finish on them which I should have sanded off before gluing.
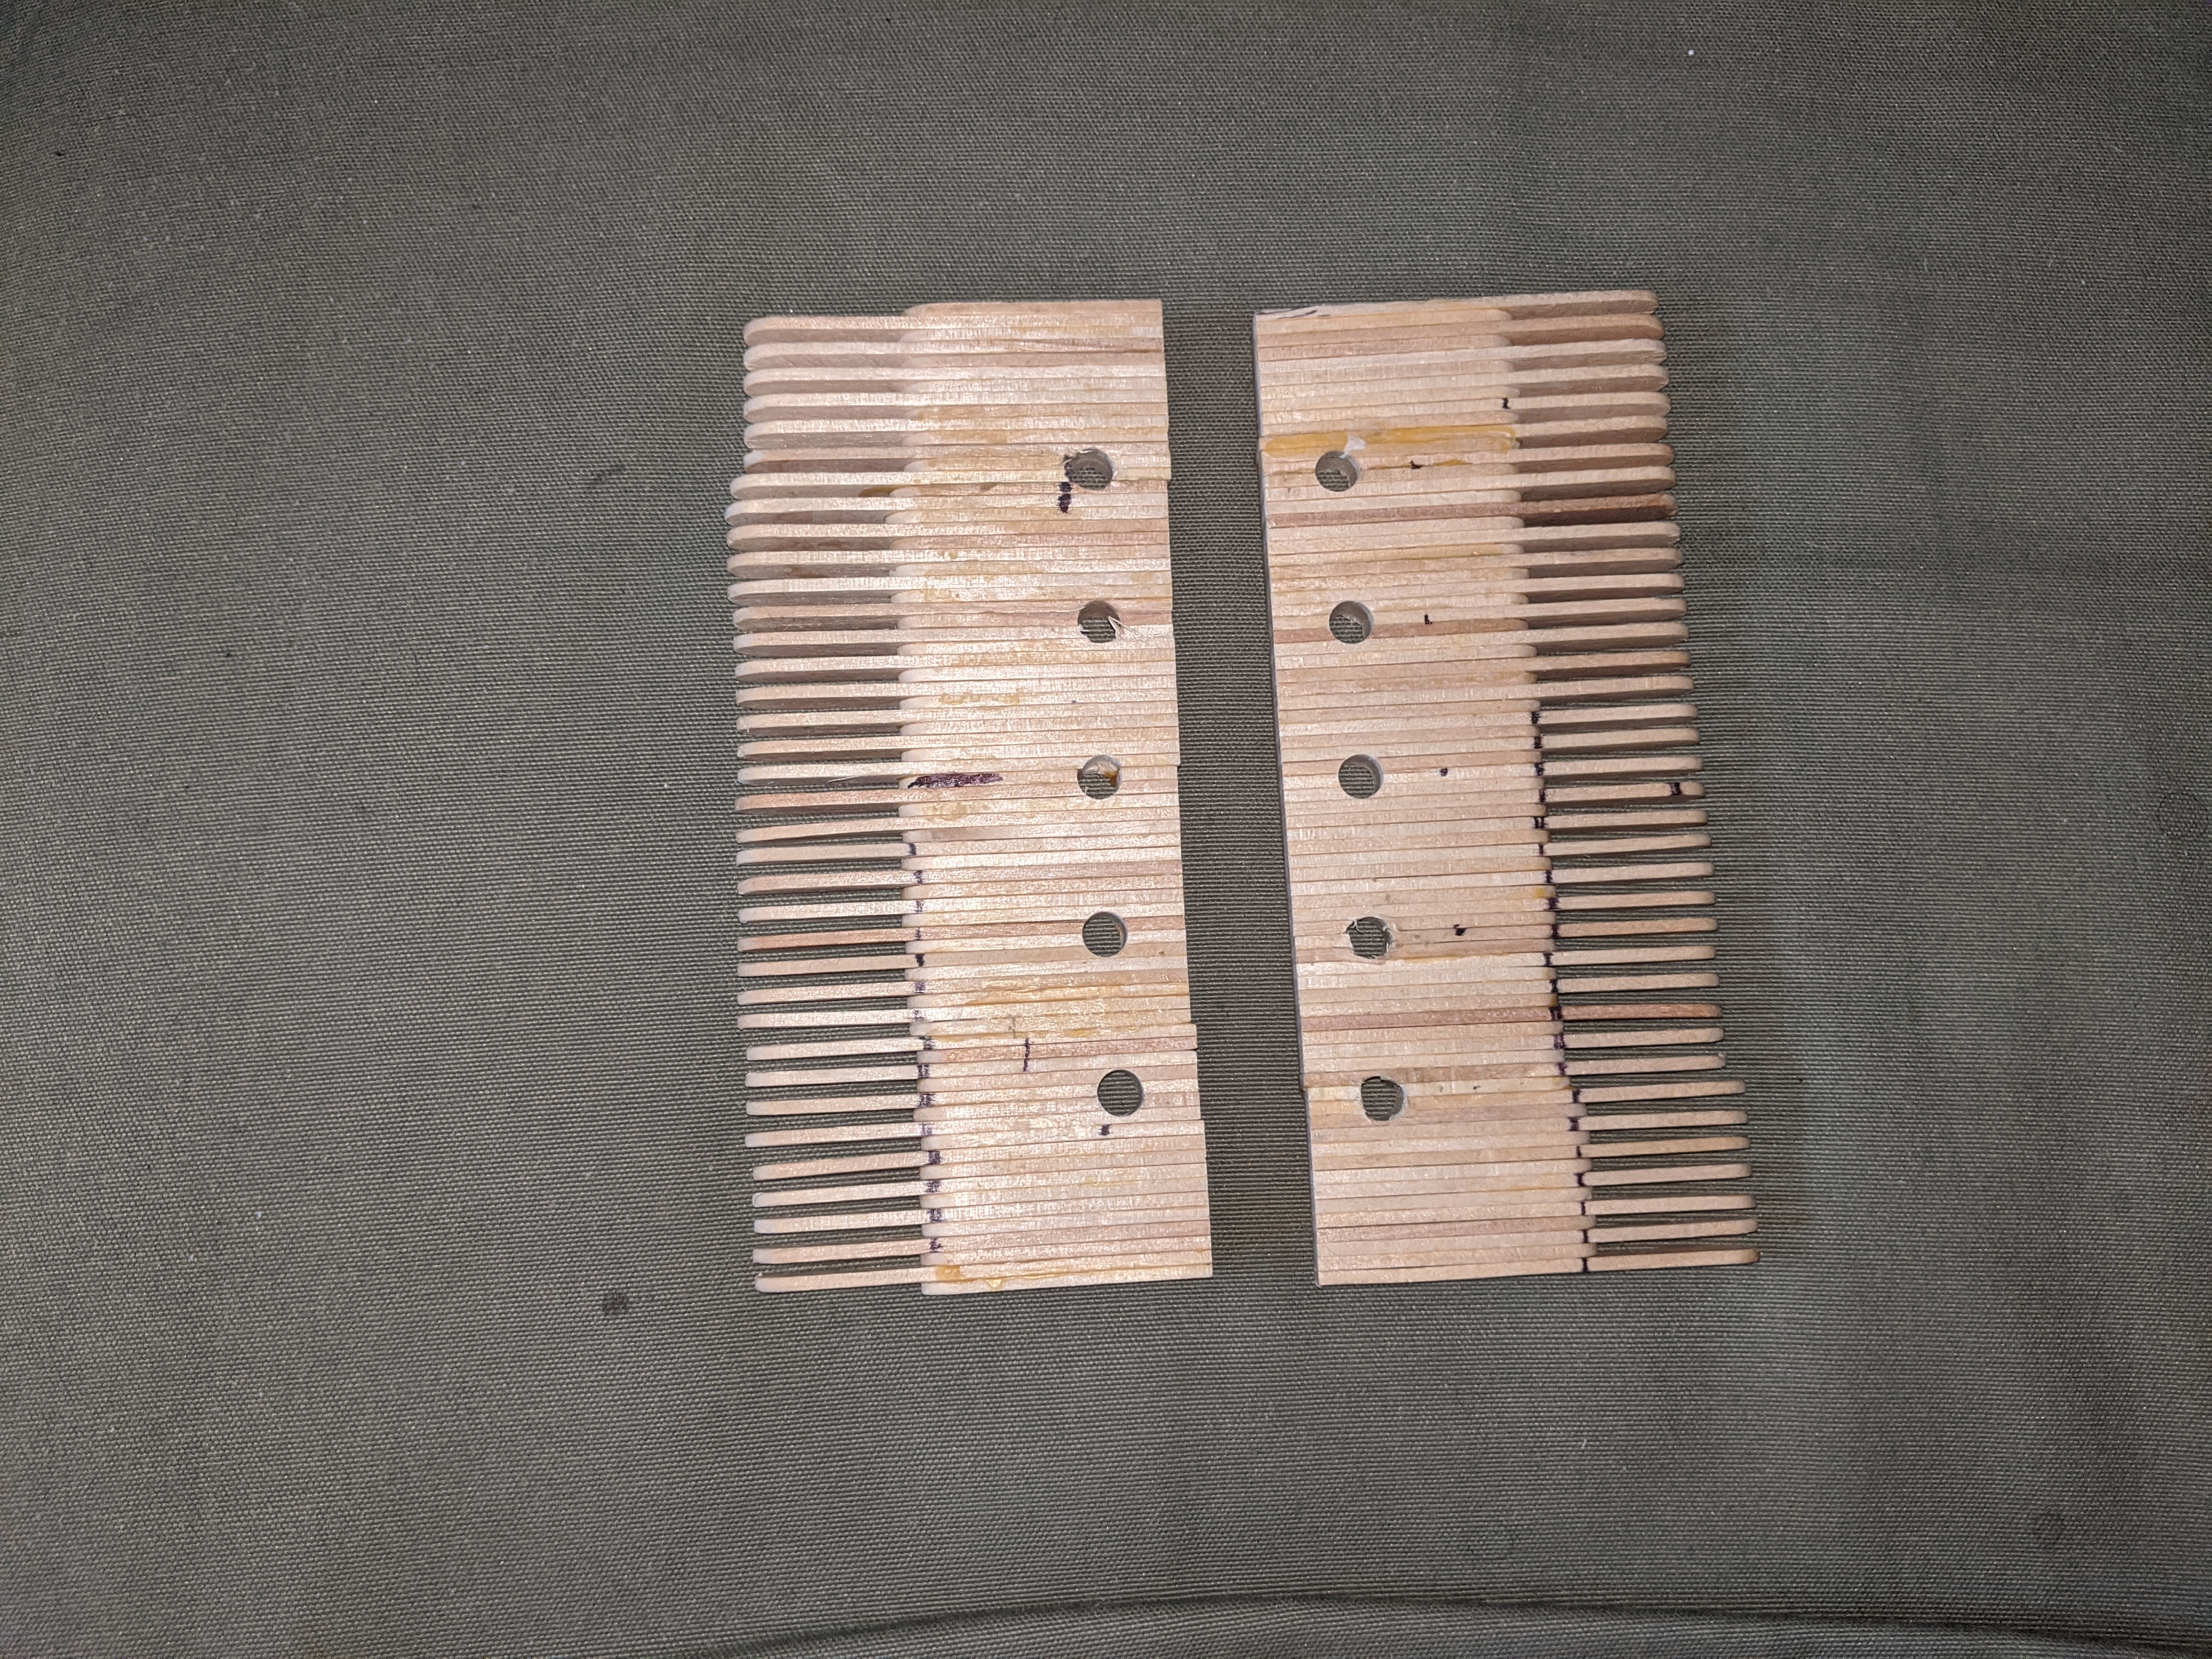
These combs are used to keep the warp threads organized while warping. They are removed once weaving commences since then the weave itself will keep the threads ordered.
I warped the loom starting with the middle warp thread and then working my way outwards, alternating sides. I tied off the end of the first warp thread to the round tensioning arm, looped it over the top bar, through the middle slots of the top and bottom combs and then back around the tensioning arm to the left of where it started. From here it loops over the top bar, through the slot in the top comb just to the left of the middle warp thread, across the outside of the middle warp thread, through the slot on the bottom comb just to the right of the middle thread and then around the tensioning arm to the right of the middle warp thread. Note that between the tensioning arm and the other two bars the warp threads should always run parallel to one another. The only place they cross is between the two combs. When a warp thread crosses from left to right it goes around the outside. When it crosses from right to left it goes across the inside. This is how the half twist of the möbius loop in introduced.
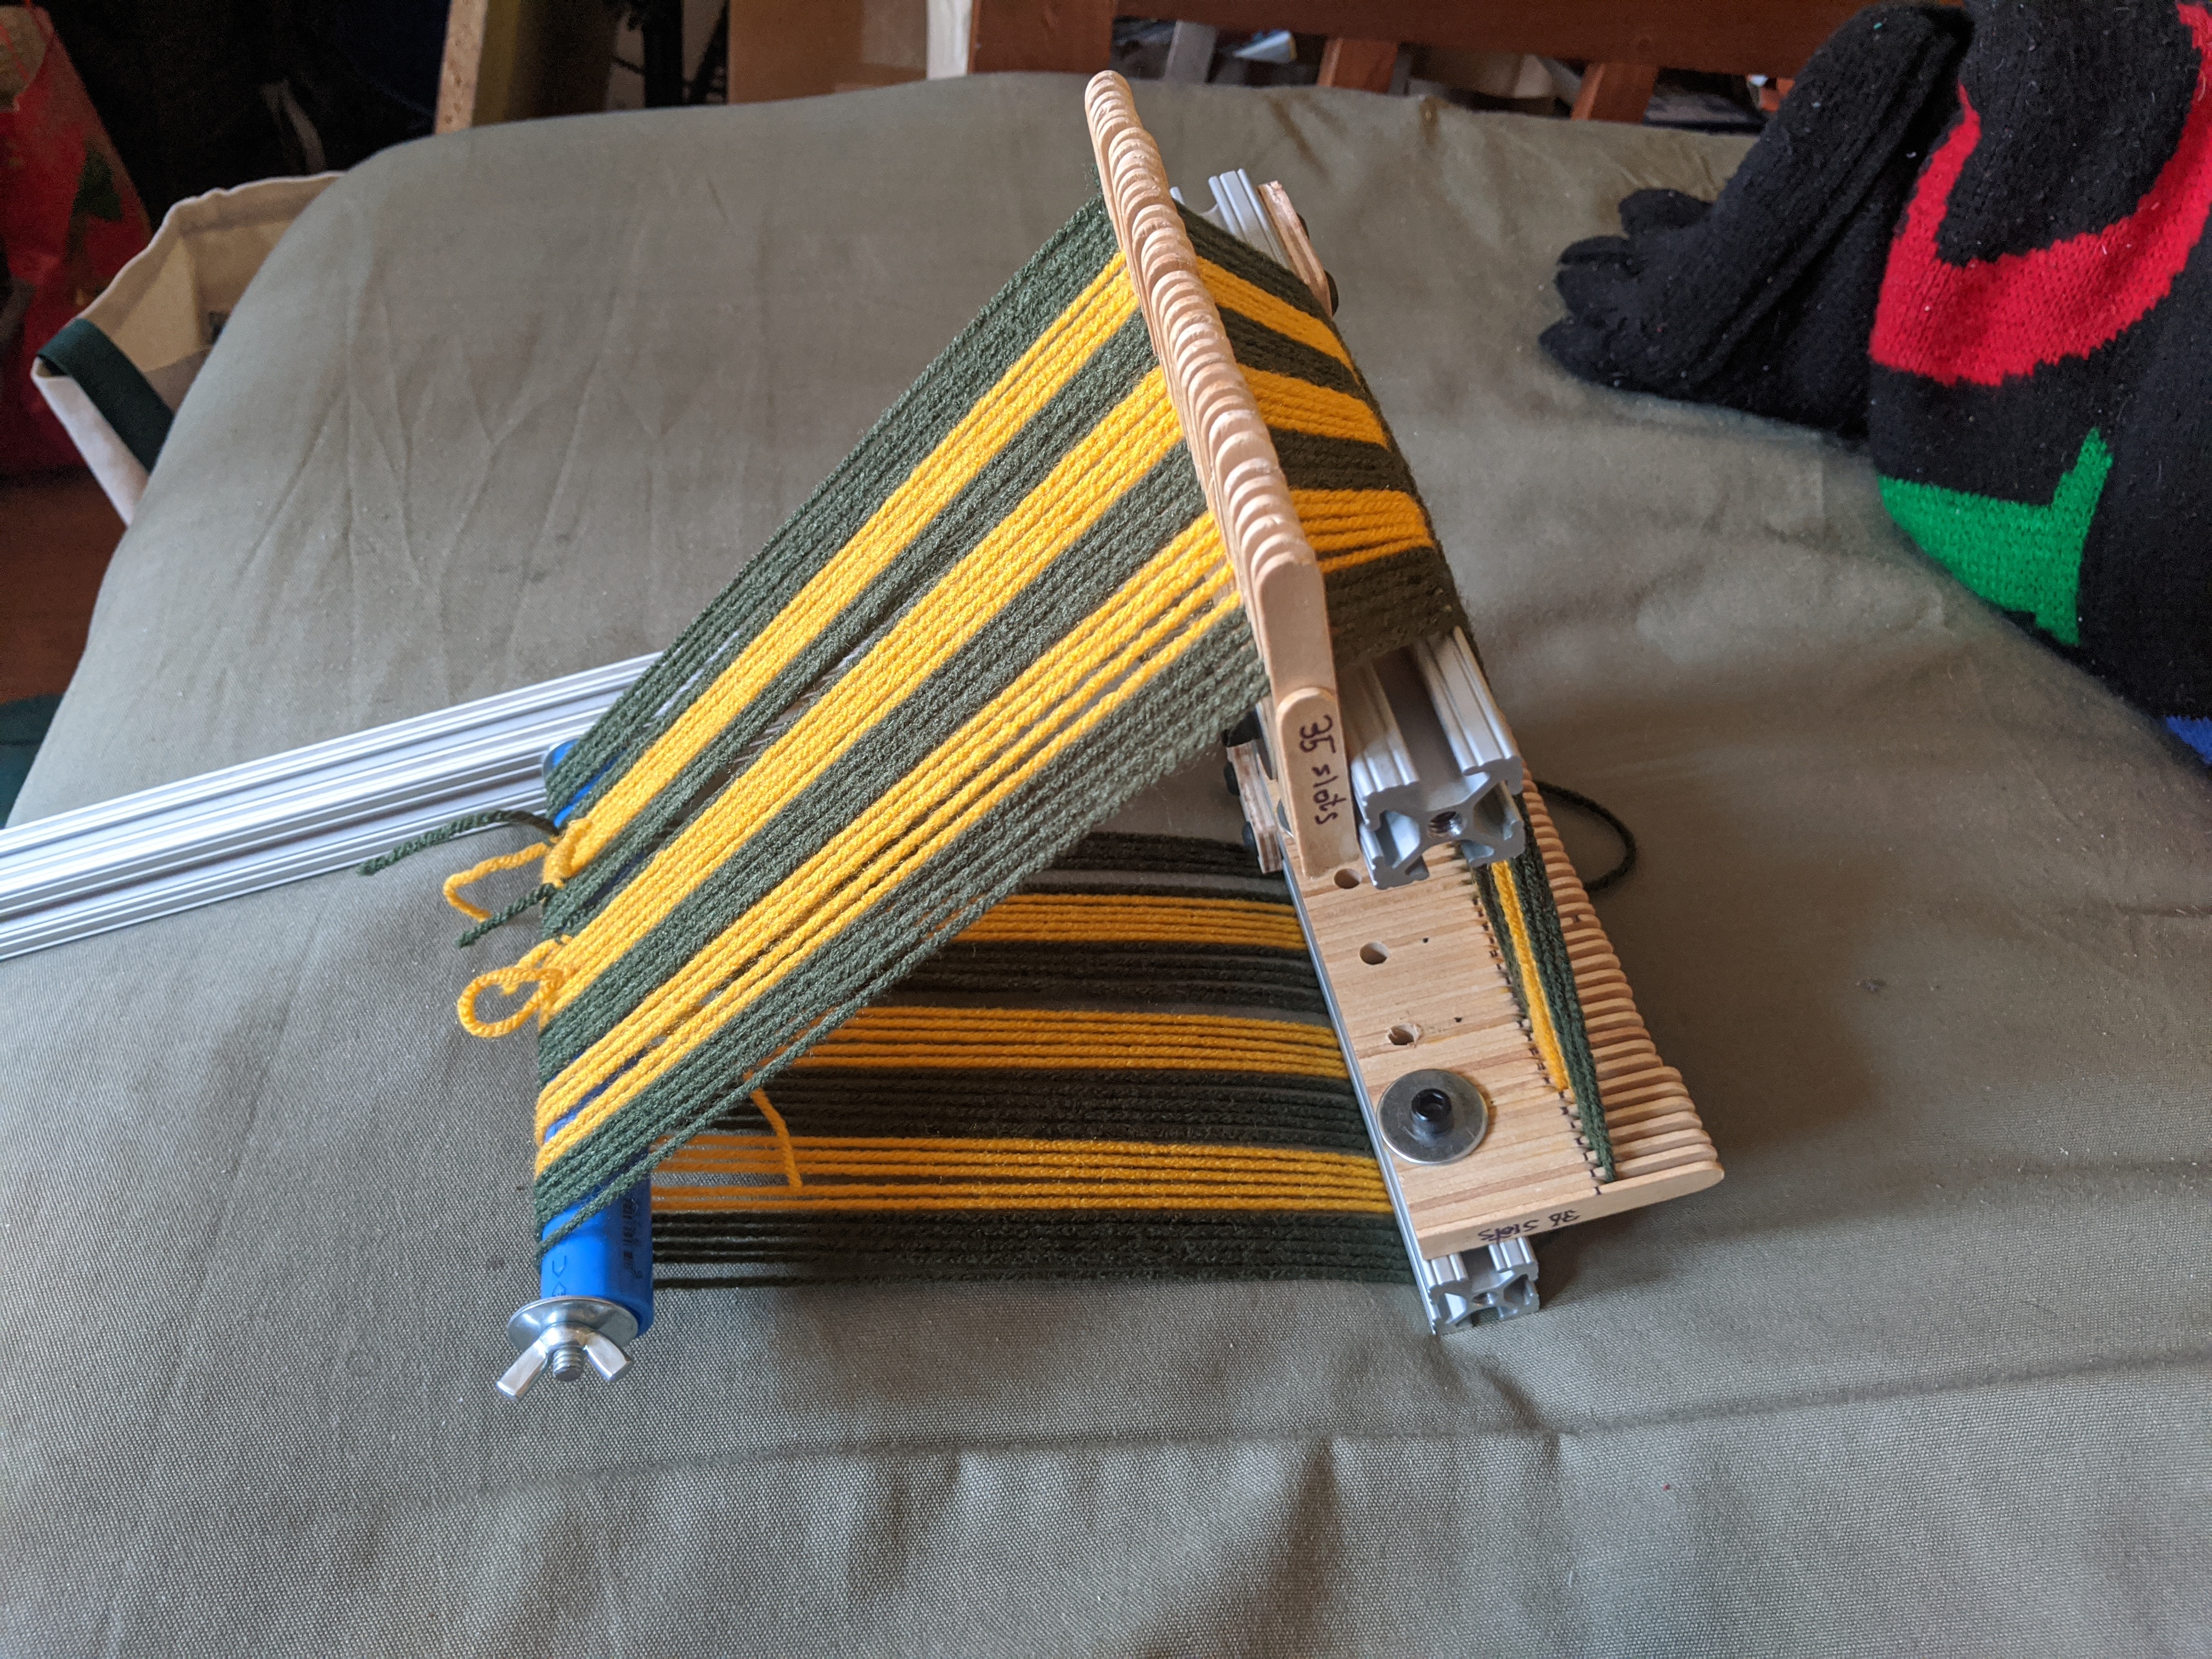
To change colors I just tied a strand of the new color to the old near the tensioning arm using a square knot.
I used a bit of sewing thread to tie the free remaining warp thread off to the last warp thread temporarily to maintain tension on the warp. I could then use the remainder of what I had been using for warp as weft without more cutting and tieing.
The loom employs two harnesses that are moved in opposition to each other. I tried using only one harness but my sheds were not reliable. I was weaving with woolen yarn that was too clingy to pass by easily.
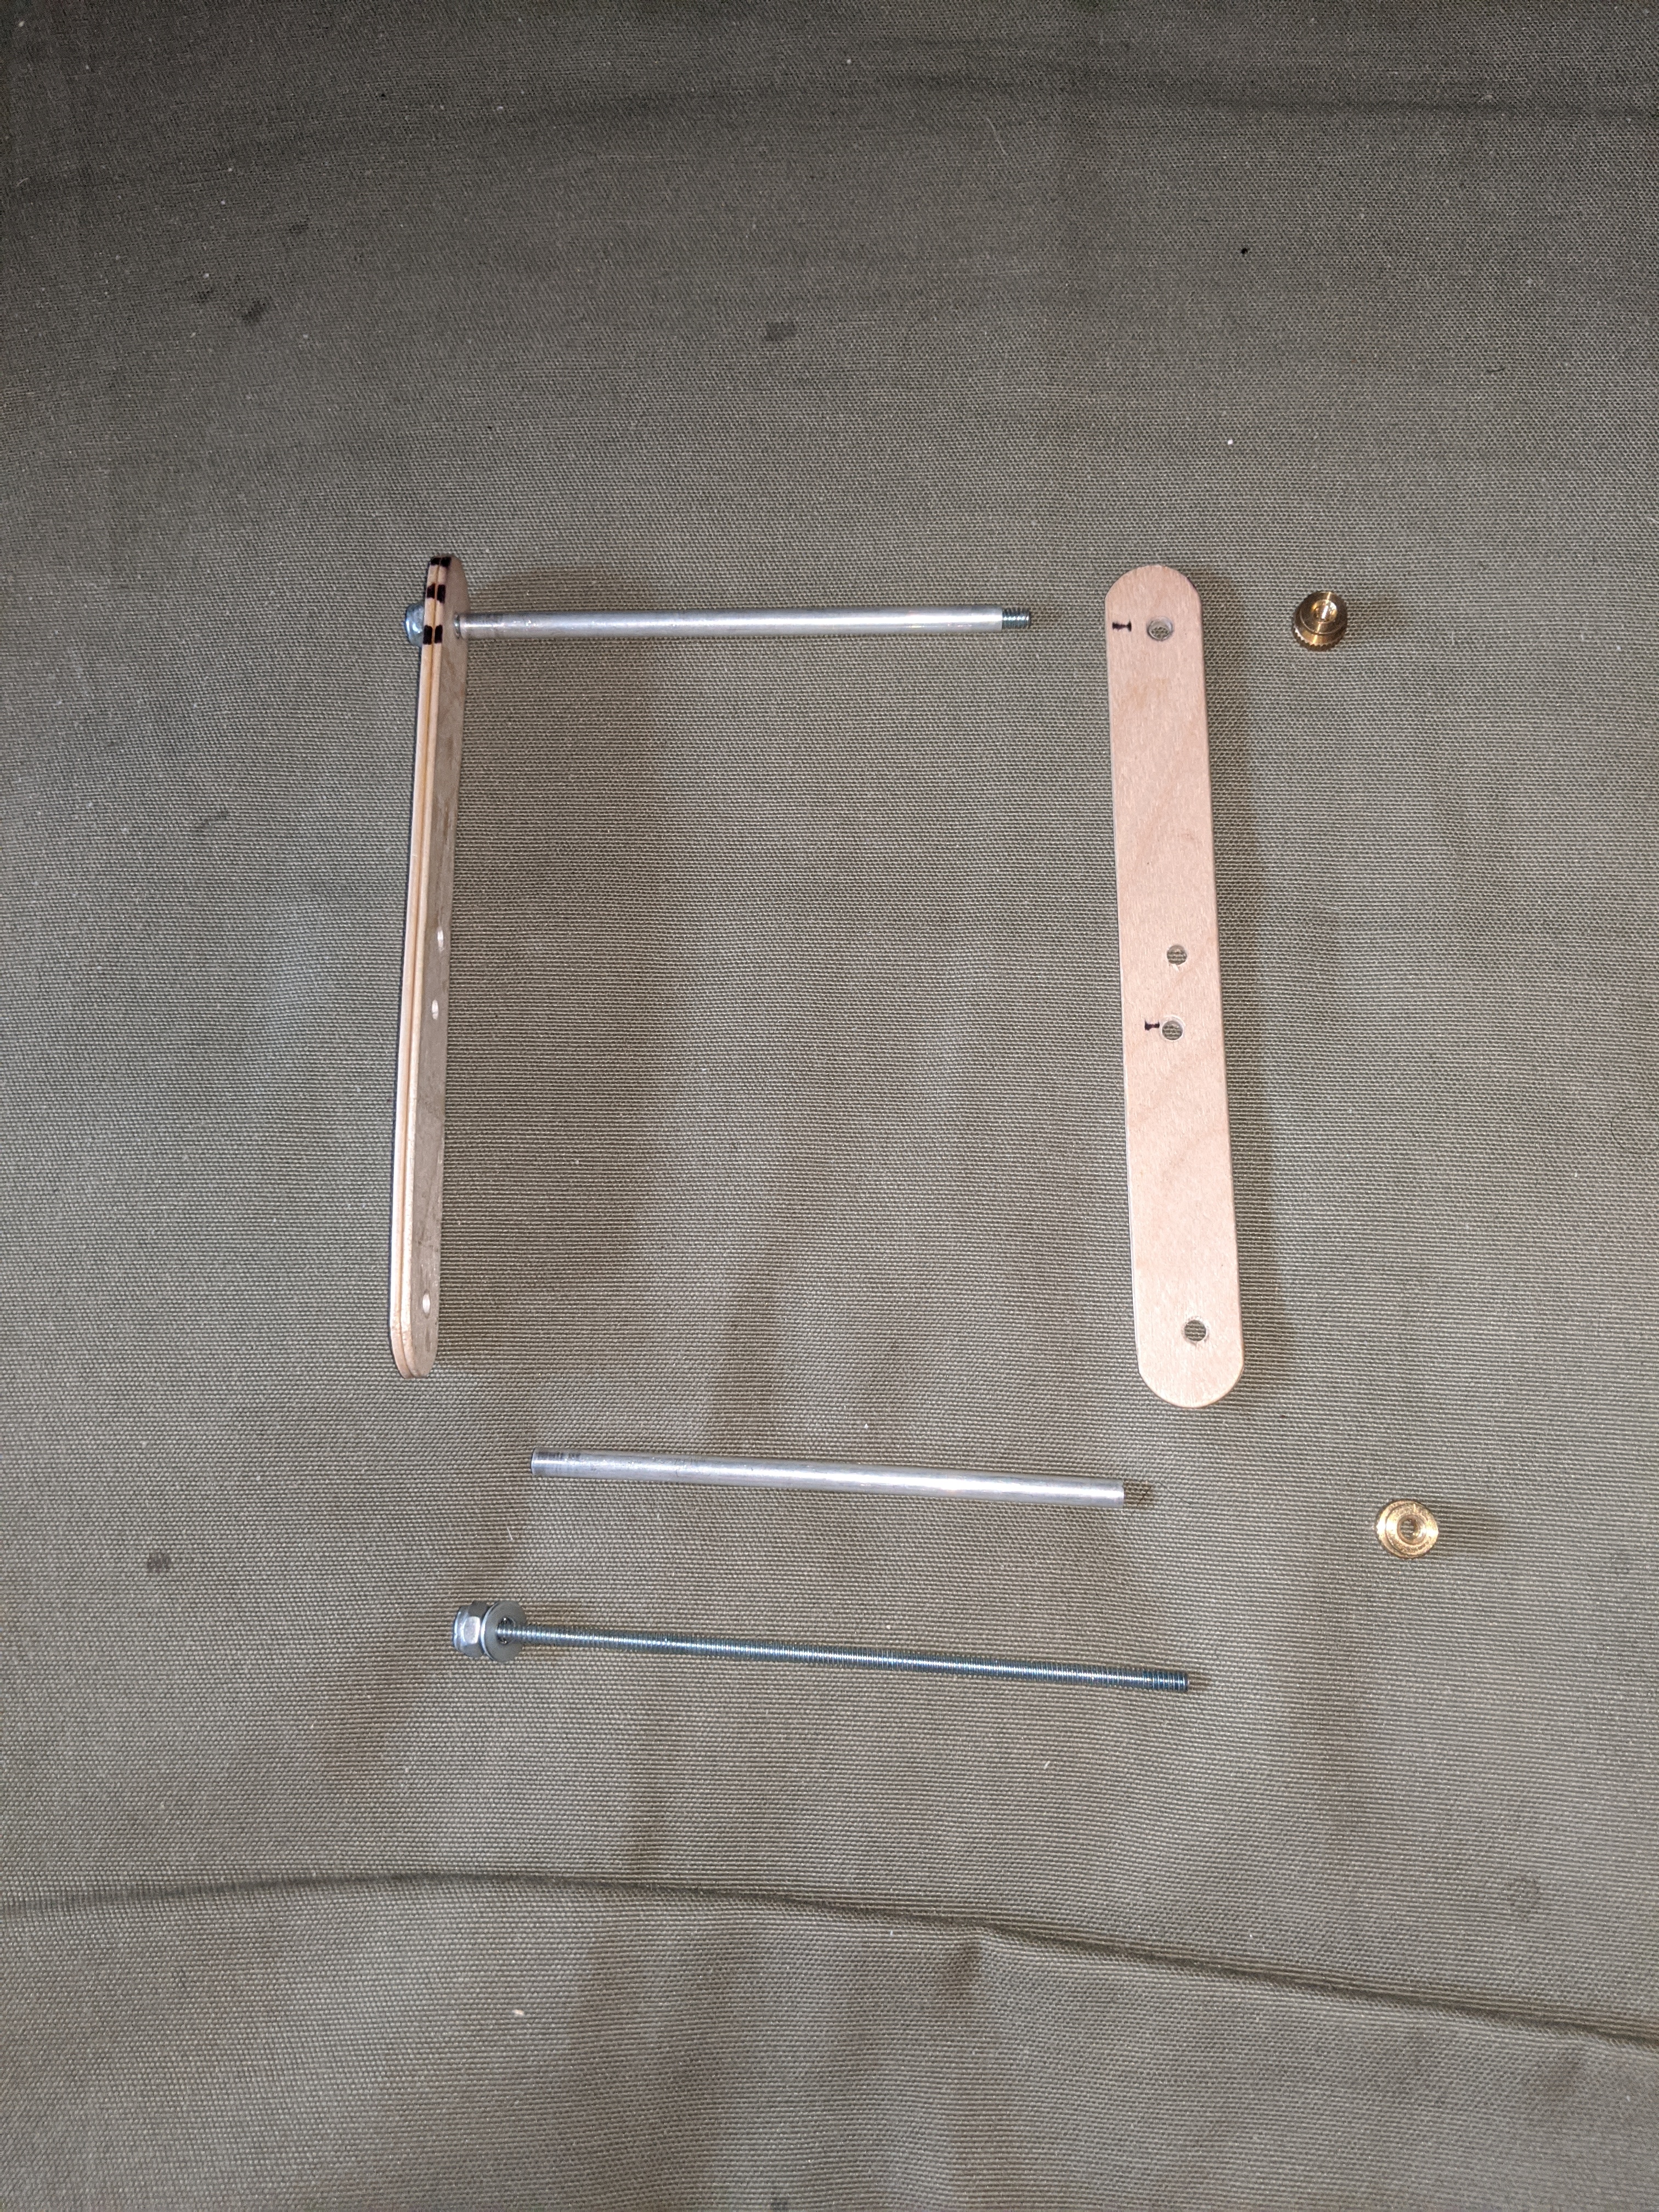
Each harness has two sides, each made of a pair of tongue depressors glued surface to surface for added strength and thickness. Between the two sides run two pieces of 6-32 threaded rod sheathed in 3/16 metal tubing (brass or aluminum are fine). At one end of the threaded rod is a nylon lock nut and washer. Each rod then passes through one side piece, the metal tubing, the other side piece and then a knurled brass nut. I splurged on round knurled brass nuts instead of wing nuts so that my threads were less likely to get hooked on them.
An extra pair of holes were drilled in each side piece a short way from the center. The nearer rod assembly can be run through these holes to serve as a jig for tieing heddles.
The first heddles I made worked well enough but we're harder to install than the second. Each heddle consisted of a pair of loops. Each loop was tied on the heddle jig described above. I think using a surgeon's knot rather than a square knot makes loops of more consistent size. Over the course of weaving I had trouble with the knots coming untied due to the repeated tension and slack on each loop. For this reason I put a drop of CA glue on each knot.
Each of these heddles consists of a top loop and a bottom loop. Each loop loops through the other to form a square knot around a warp thread. The top rod of the harness is then run through the top loop of the heddle and the bottom rod through the bottom loop. Heddles were installed from left to right on the odd numbered warp threads (in the order that they pass through the top comb).
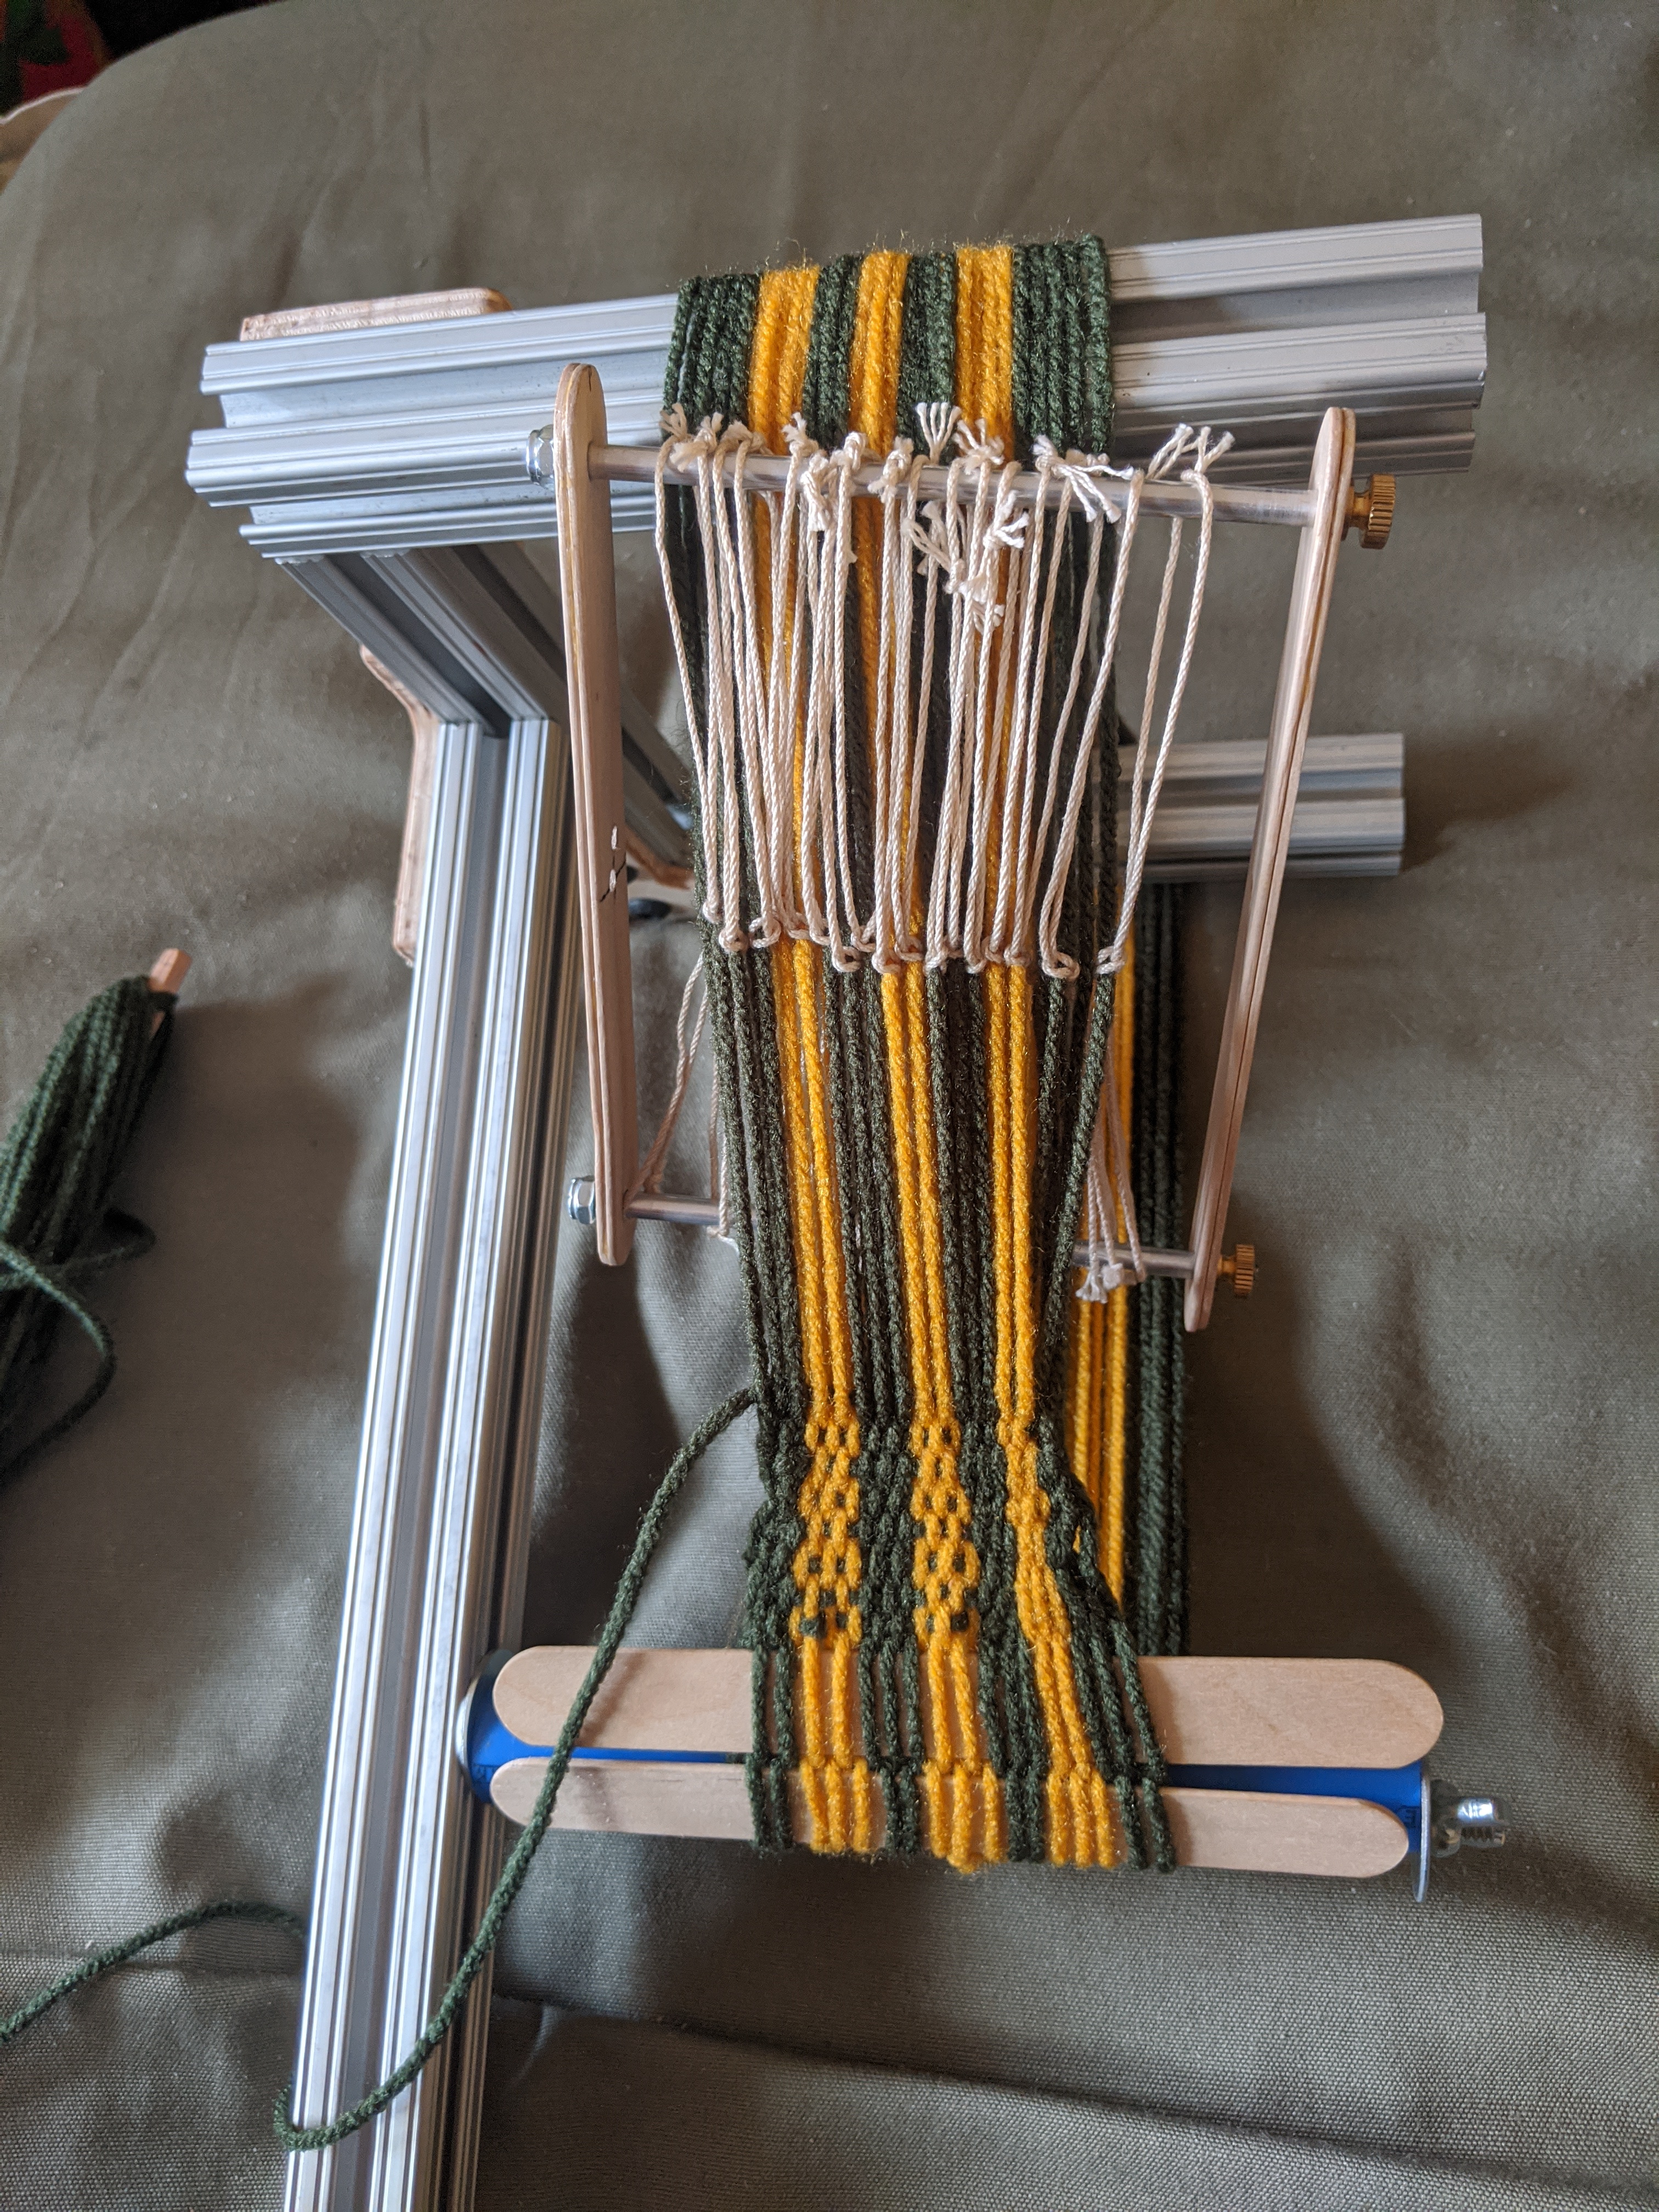
The easier heddling approach uses two long cords: one for each rod of the harness. I used "squidding line" from my maternal grand mother's treasure trove of interesting and some day useful things.
Each cord loops around a warp cord and then back around it's rod. The two cords are threaded to cross each other with the warp cord in between them. I used binder clips to hold each cord to its respective rod while my hands were busy with the other. This is how I heddled all of the even numbered warp cords to the second harness. The cords are then tied off to their respective rods, making sure all of the loops are even and a little bit loose so the warp cords can be slid through as the weaving progresses.

I made a shuttle out of a piece of scrap wood. Unfortunately, I got a bit careless with the coping saw and cut off two of it's ears.
I first wove in two tongue depressors to verify my two sheds and provide a straight line to beat against. Actually, the tieing off of the warp thread when it transitioned to the weft was done after the two temporary tongue depressor rows were woven.
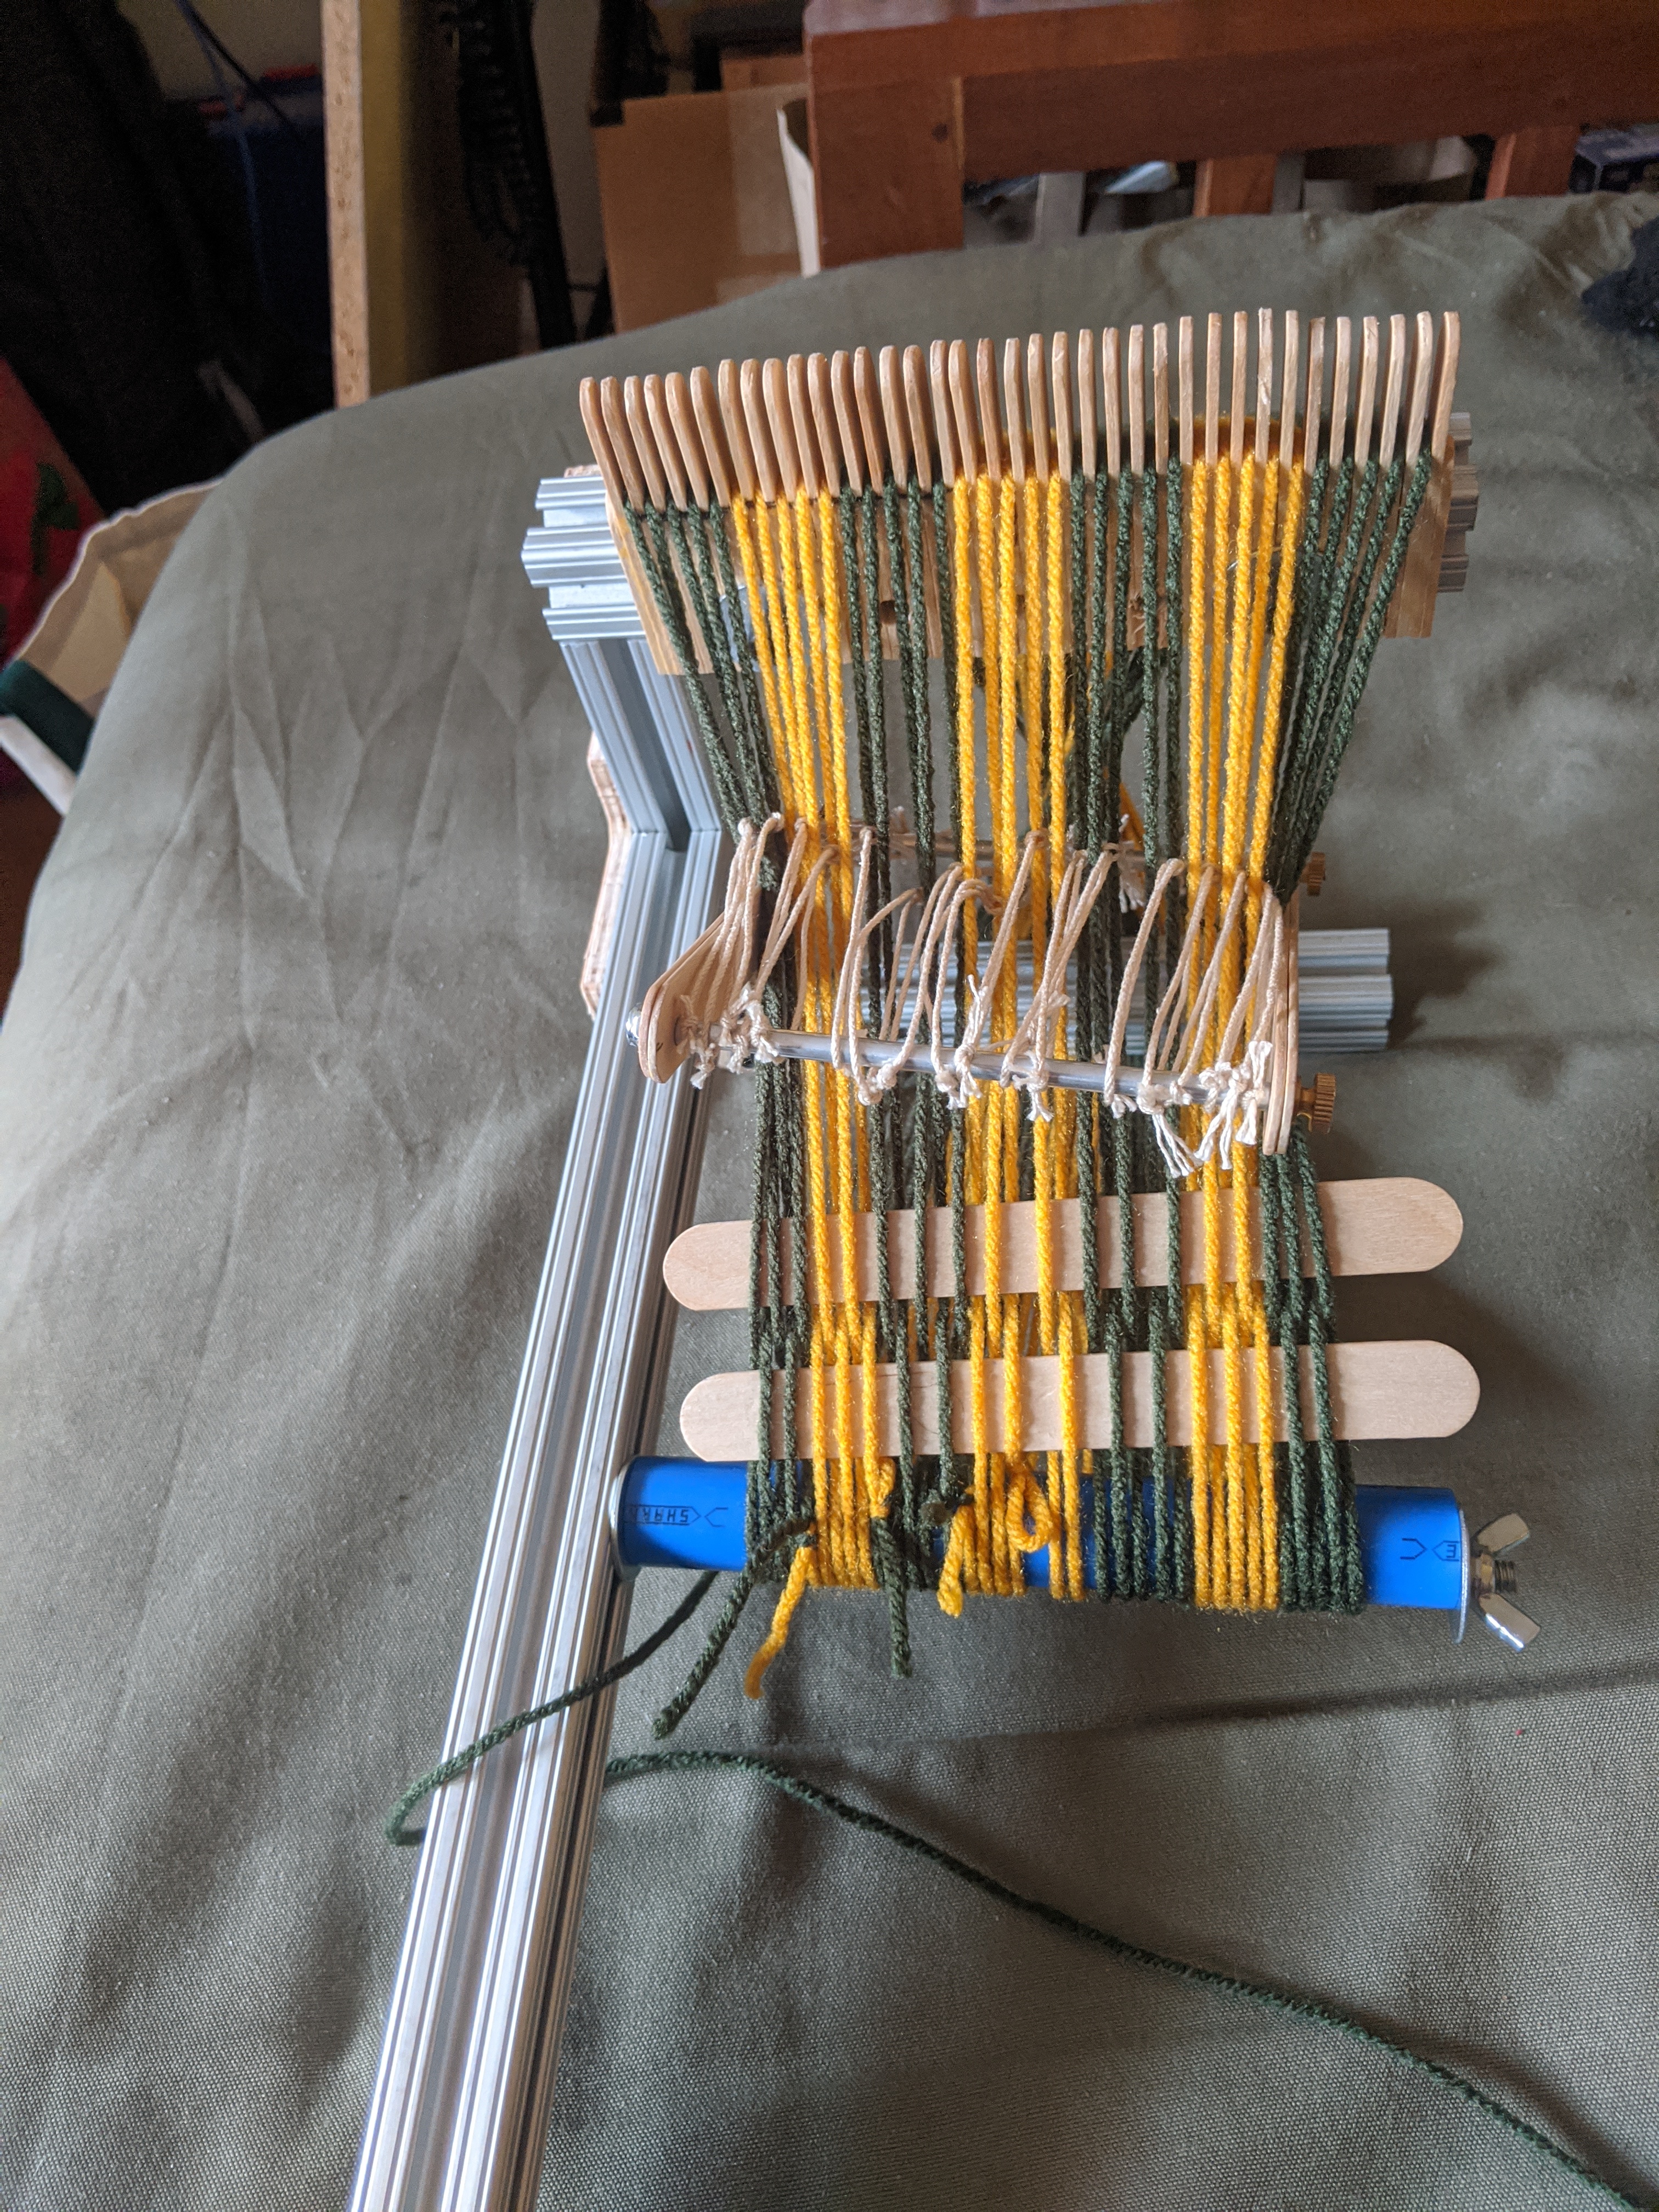
I then wove in the weft, alternating sheds. After a few inches the tongue depressors could be removed. I forget what I did to the starting end of the warp that was originally tied to the tensioning arm. I think I just tied it to one of it's neighbors and cut it off, but I might have sewn it in with a darning needle.
I continued weaving until the unwoven section was too small to open a big enough shed to fit the shuttle through. At that point I switched to a crochet hook. Eventually there was not enough unwoven warp to fit both harnesses so I removed one, keeping the other to track which warps were which, and wove the rest with a darning needle. Once space was too tight for that I unthreaded the darning needle and used it as a stick to spread the recent weft threads into whatever gap remained.
There is probably no utility to having a woven möbius loop, but making one was an interesting and gratifying mental and dexterity exercise.
Here are some Möbius loop weaving projects from others that I found through a Google search:
Kim Winter also used a wire frame for her loop .
The approach I took is perhaps closest to that of Harma Pieniing .